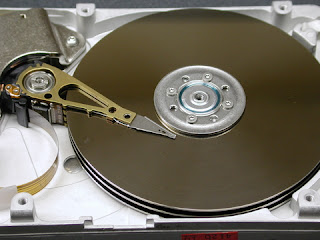
Unused space on hard drives recovered?
 Yeah....believe what you saw in this article..This is the interesting thing to know, and interesting post i do.....I have see it in a thread one of the local forum, after i search about it i've found the site which elaborate bout this....So i read and i present it here...if you wanna proof, just believe and try to do it....!!
* UPDATE Does this work? We're not going to try it on our own machine thank you very much. Instead, we're waiting for a call from a hard d
rive company so we can get its take on these claims.
** UPDATE II A representative for large hard drive distributor Bell Micro said: "This is NOT undocumented and we have done this in the past to load an image of the original installation of the software. When the client corrupted the o/s we had a boot floppy thatopened the unseen partition and copied it to the active or seen partition. It is a not a new feature or discovery. We use it ourselves without any qualms".
*** UPDATE III See the letters column today, here. Required items
Ghost 2003 Build 2003.775 (Be sure not to allow patching of this software) 2 X Hard Drives (OS must be installed on both.) For sake of clarity we will call the drive we are trying to expand (T) in this document (means Target for partition recover). The drive you use every day, I assume you have one that you want to keep as mater with your current OS and data, will be the last dive we install in this process and will be called (X) as it is your original drive.
1. Install the HDD you wish to recover the hidden partitions (hard drive T) on as the master drive in your system with a second drive as a slave (you can use Hard Drive X if you want to). Any drive will do as a slave since we will not be writing data to it. However, Ghost must see a second drive in order to complete the following steps. Also, be sure hard drive T has an OS installed on it You must ensure that the file system type is the same on both drive (NTFS to NTFS or FAT32 to FAT32, etc)
2. Install Ghost 2003 build 2003.775 to hard drive T with standard settings. Reboot if required.
3. Open Ghost and select Ghost Basic. Select Backup from the shown list of options. Select C: (this is the drive we want to free partition on on hard drive T) as our source for the backup. Select our second drive as the target. (no data will be written so worry not). Use any name when requested as it will not matter. Press OK, Continue, or Next until you are asked to reboot.
Critical step
4. Once reboot begins, you must shutdown the PC prior to the loading of DOS or any drivers. The best method is to power down the PC manually the moment you see the BIOS load and your HDDs show as detected.
5. Now that you have shutdown prior to allowing Ghost to do its backup, you must remove the HDD we are attempting to expand (hard drive T which we had installed as master) and replace it with a drive that has an OS installed on it. (This is where having hard drive X is useful. You can use your old hard drive to complete the process.) Place hard drive T as a secondary drive in the system. Hard drive X should now be the master and you should be able to boot into the OS on it. The best method for this assuming you need to keep data from and old drive is:
Once you boot into the OS, you will see that the second drive in the system is the one we are attempting to expand (hard drive T). Go to Computer Management -> Disk Management
You should see an 8 meg partition labeled VPSGHBOOT or similar on the slave HDD (hard drive T) along with a large section of unallocated space that did not show before. DO NOT DELETE VPSGHBOOT yet.
6. Select the unallocated space on our drive T and create a new primary or extended partition. Select the file system type you prefer and format with quick format (if available). Once formatting completes, you can delete the VPSGHBOOT partition from the drive.
7. Here is what you should now see on your T drive.
a. Original partition from when the drive still had hidden partitions
b. New partition of space we just recovered.
c. 8 meg unallocated partitions.
8. Do you want to place drive T back in a PC and run it as the primary HDD? Go to Disk Management and set the original partition on T (not the new one we just formatted) to and Active Partition. It should be bootable again if no data corruption has occurred.
Caution
Do not try to delete both partitions on the drive so you can create one large partition. This will not work. You have to leave the two partitions separate in order to use them. Windows disk management will have erroneous data in that it will say drive size = manus stated drive size and then available size will equal ALL the available space with recovered partitions included.
This process can cause a loss of data on the drive that is having its partitions recovered so it is best to make sure the HDD you use is not your current working HDD that has important data. If you do this on your everyday drive and not a new drive with just junk on it, you do so at your own risk. It has worked completely fine with no loss before and it has also lost the data on the drive before. Since the idea is to yield a huge storage drive, it should not matter.
Interesting results to date!!!:
Western Digital 200GB SATA
Yield after recovery: 510GB of space
IBM Deskstar 80GB EIDE
Yield after recovery: 150GB of space
Maxtor 40GB EIDE
Yield after recovery: 80GB
Seagate 20GB EIDE
Yield after recovery: 30GB
Unknown laptop 80GB HDD
Yield: 120GB


